Monday, May 21, 2012

Cherry Tilda

I saw this cherry rhinestone sticker at Target and knew exactly what I had to do with it. If you want one run do not walk to your nearest Target. They are on clearance in the see spot save section. I got a bunch for 30 cents a piece - had been a dollar.


Tilda is colored with copics and highlighted with a white pen. The yellow dotted paper is the background from the cherry sticker. Waste not want not. lol The scalloped squares are die cuts from nestabilities. The blue dotted stripes are tape from the Queen and Company. I put red ribbon behind the stripe of blue and a smaller ribbon over the cherry stem. The red dots at the bottom are nailhead stickers. After I was done something didn't seem just right so I added the swirls - die cuts from sizzix and then added stickles to them. I am submitting this card at http://scrapbitzcopics.ning.com/group/cmccopicchallengegroup for the anything goes challenge and for Tilda's Town anything goes challenge http://tildastown.wordpress.com/2012/05/18/challenge-1-anything-goes/

Tuesday, May 15, 2012

Bird

Collage stamps are some of my favorites so when I saw this Hero Arts bird collage I just had to have it. 


This image is colored with copics and then there are sparkly pen accents and glitter glues added. The key is a memory box die cut and the circle is a nestabilities from stampabilities. I colored the circles in with my copics and traced around the inside edge. The buttons are some from my stamping stash and from my dress making stash (I have lots of different stashes lol) The blue lined paper is from bo bunny. The paper behind it is from basic grey. Both are edged with midnight blue chalk ink. The plaid strip and blue polka dot strip are trendy tape form Queen & Co. It is really cool as parts are transparent and let the paper show through. I thought it turned out pretty cool. Different from the style I have been doing lately. Gotta stir things up now and then.

Monday, May 7, 2012

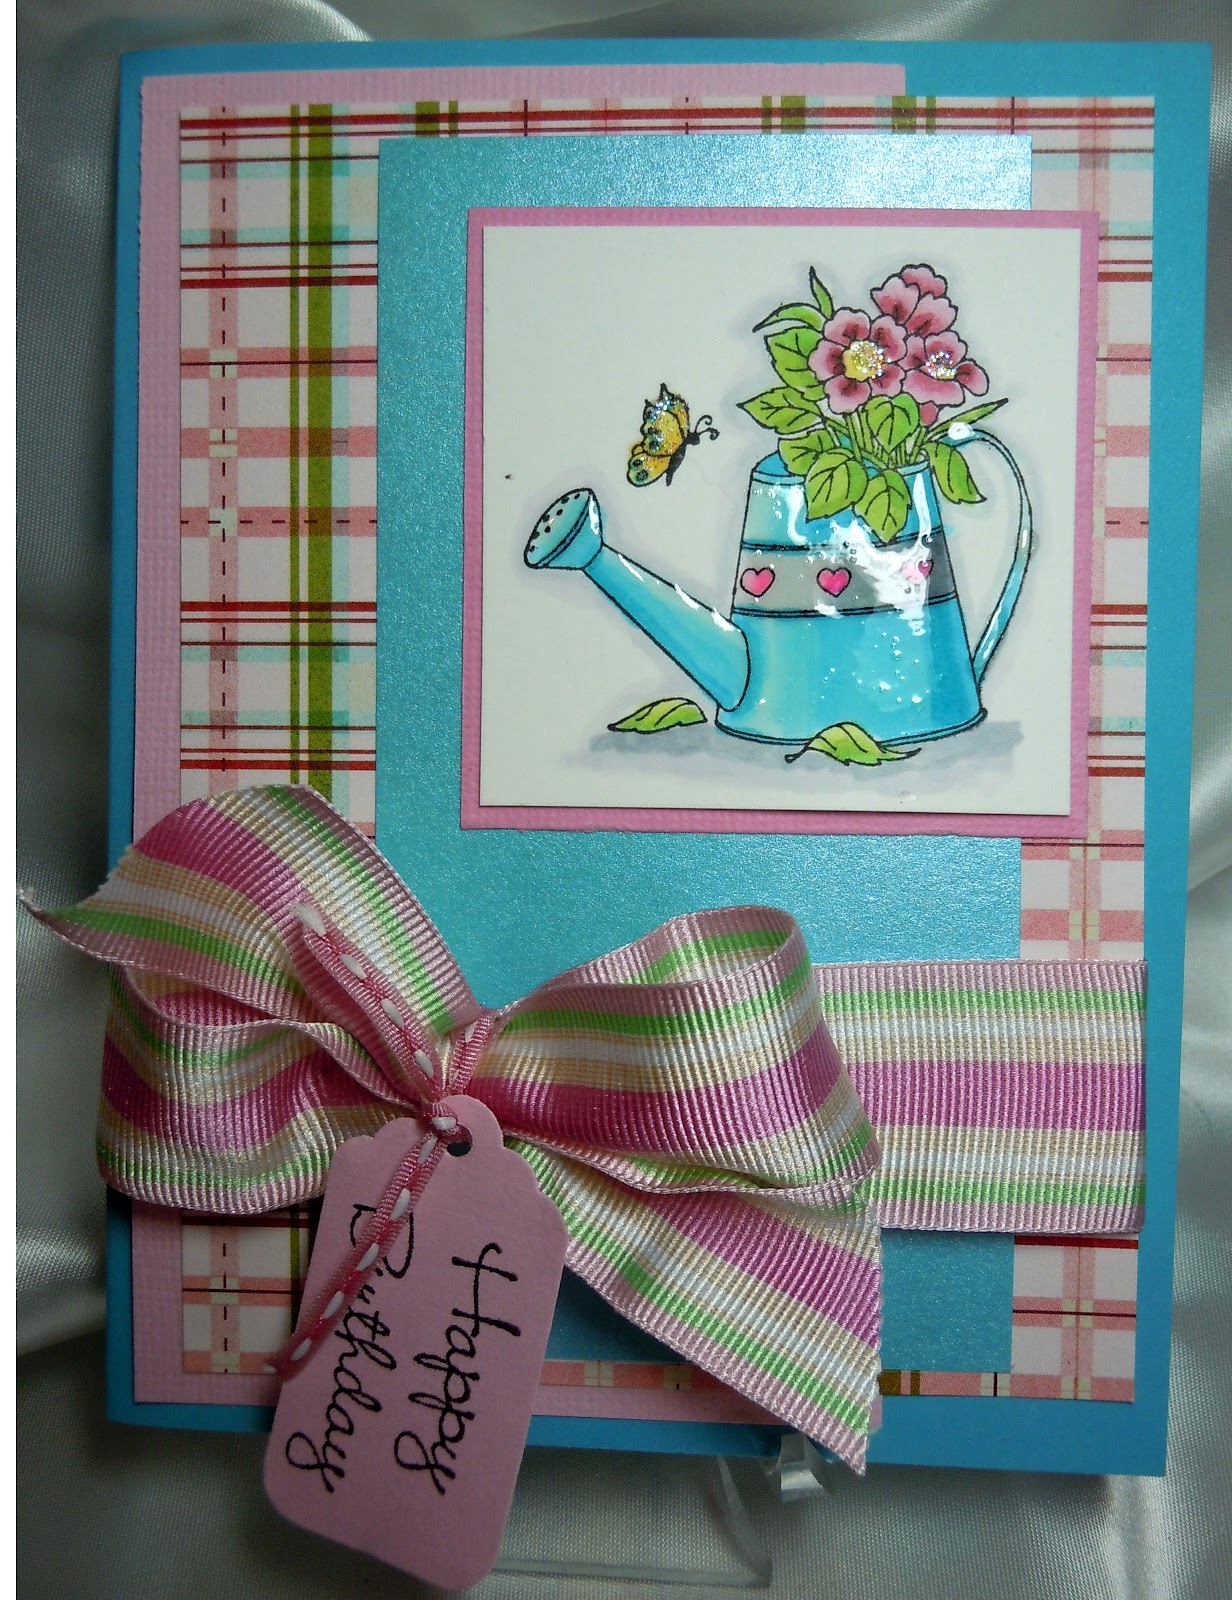
Watering Can

I got this watering can stamp from Susana's Custom Art and Card Design here. I had stamped it a while back and then it didn't work for the sketch I was using so I set it aside. I pulled it out a couple of days ago and created this card.


I left the card pretty simple but I love this big bow with the tag tied on. The image is colored with copics. The watering can has diamond glaze applied to it. The flower centers and the butterfly have touches of stardust stickles. The dp is from basic grey. The other cardstock is all scraps I had laying about. I don't know about you but I have more scraps than I know what to do with so I love using them when I can.

Little Things

I love butterflies. There is hardly a stamp with a butterfly that I don't love. So when I found this digi from That's Fabulous here I just had to get it. 


I found a pretty moth and colored it similar. I know it is a butterfly but I liked the look of this moth. It is colored with copics and has some star dust stickles added. I put lots of flowers on the side and used yellow stickles for the centers. For the ribbon I put down scor-tape along the bottom and the added the ribbon by making little tucks along the way and pressing them down with my hand. 
I really like how it turned out. I have an owl that I got from the same place can't wait to use it now. It's so fabulous to make cards.

Friday, May 4, 2012

Teddies

My youngest dd turns 20 on Tuesday. It means no more teenagers. How sad is that. I have had teenagers in the house for 15 years and now those years will be gone. I never had a problem with any one age more than another so this is a bittersweet moment. I am getting older. lol Here is the card I made for her. She loves teddy bears.


The image is from Bildmalarna. It is all colored with copics. The pump has diamond glaze on it. The flower centers are done with citrus flower soft. The corner punches are done with ek success punches. The lady but is an old earring of my dd's as is the butterfly. So she should get a kick out of those embellishments.
Here is another view without the glare on the pump.

Hope you enjoy.

Wednesday, May 2, 2012

Stamper's Quest Pastels

Here is a card I did recently for Stamper's Quest. The challenge was to use pastels. I don't know why but I had a lot of trouble getting the right colors. Finally, I got it worked out and this is the result. The stamp is from http://www.susanascustomartandcarddesign.com/


To see how I did it go to http://stampersquest.com/2012/05/01/playful-pastels-peggies-view/

Friday, April 20, 2012

Raining Tilda

I originally made this for a pastel card to be submitted to Stamper's Quest but some how it didn't speak pastel to me so I decided to do a different card. I still like this one however.


Tilda is paper pieced and then copics are used to shade her. Spots and lines of white pen are used for accents. The dp is perhaps from basic grey. The words are from an old angel company stamp set. I added the dots with a sharpie black pen. The blue frame was white and then colored with brilliance blue ink pad. The ribbon was then tied around it. The flowers are cut from a die by my favorite things. The dots are sparkly candy dots. The butterfly was from my stash. We are supposed to get rain tomorrow so I may need to borrow Tilda's umbrella. Hope you enjoy.

Tuesday, April 10, 2012

Hot Mama

My girlfriend just had a birthday and this card is for her. She is 9 months younger than I am but always says she is 30. Let me tell you she is not. lol 

This is a digi stamp but I can't remember who it is by for the life of me. Senility is setting in. This cutie called Hot Mama (that I can remember) is colored with copics. Some stickles are on the flame and the pink frosting. The scalloped circle has holes punched out and dots applied around it. The candy dots in the flower center and below the lace are not quite so blue in real life. Added a bow as well. I need to get this out tomorrow as I am already late. The story of my life. lol

Doctor Edwin

I was asked to make some get well cards for church and this is the first one.


Edwin is colored with copics. His headpiece and stethoscope both have some stickles on them. I cut out an oval and scalloped oval out of basic grey. I lightly traced Edwin on to the white oval and then using a sponge and chalk ink made the blue shadow around him. The words were done on the computer using word art. On the blue circle around the words I wrote the words turn all the way around. Soo... you would knot to turn the circle to see the rest of the words. 

 You can't quite see all the words this time but it says "Listen to your doctor". I measured to find the center of the circles and punched a small hole with a long armed hold punch. Then I figured out where I wanted the words to be and put a small dot on the back of the oval through the hole so I would know where to punch that hole.And attached them together with a brad. The oval is raised with foam tape so the words will turn easily.The button is tied around the ribbon with scrappers floss to make the bow. Three nail head stickers are in the one corner. 

Here is the inside.
Hope you enjoyed this edition of Dr. Edwin. 
As always I love your comments. They mean so much to me.

Monday, April 2, 2012

Soccer Tilda

A girl in mt kids club at church likes to play soccer so this card is for her.I kept it kinda simple because she is a bit tomboyish - that and it was late last night when I was making it and I had to get it out today if it had any chance of making it to her by her birthday. lol


I took Edwin's body from playing soccer and added a Tilda head from a Christmas stamp but can't remember her name. It started out all blue but then I thought it needed a little more color so I added the red background then there was some red mulberry paper laying about so I added it and then put red flowers in the grass to help tie it together. I put some buttons on and added a bow at the bottom. Tilda/Edwin is all colored with copics. Hope you enjoyed my head "transplant."