Can you believe that it is the 25th of the month already. That means Christmas is 6 months away. It always comes around so fast. That's one thing I like about this blog hop it helps me create some Christmas cards early so I won't stress quite so much later. lol If you have come from Norma's fantastic
blog you are on the right track. If you have gotten lost or have come here by accident you might want to start
here or go
here for a list of all the participants. I'll have to warn you this is going to be a long post. Now on to my card.

First I have to thank Norma for sharing some stamped images of this Tilda with me. I think I will have to ask Diana at
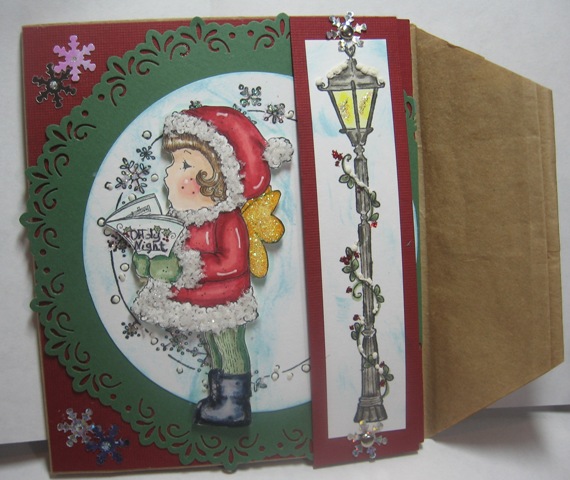
here if she can get me this stamp as I love it. I used my white pen to mark out White Christmas and used a sharpie to write in O Holy Night. The lamp post is from the spring or the wedding collection not sure which but I added some white applique to make it snowy and Christmasy. Tilda is colored in copics. I don't know which ones because I made the owl card below at the same time and the colors got all jumbled. The fur on Tilda is polar white flower soft.The boots have diamond glaze on them. The circle behind Tilda is another Magnolia stamp called snowy circle I think. It has stickles on the snowflakes as do Tilda's wings and the light in the lamp post. The green circle was cut with a fiskars circle punch. The snowflakes are from hero arts. The blue around Tilda and the lamp post is a distress ink. The fun part of this card is that it is made from a paper bag. I'll show you how I did that in just a minute. If you want to go on to the next blog here is the link to Robin's great
blog otherwise stay tuned for the tutorial on how to make this card.
First here is the inside.
You could use the bag opening to put in a gift card or a Christmas newsletter. There is a half circle punched out right there so the recipient could see it.
Here is the backside
First lay the lunch bag down with the bottom side up like this
Next take the bottom of the bag and fold up
Now glue that flap down and cut triangles off the sides right where the fold comes up like so
Fold the open end of the bag up to the flap like so
Then fold the flap down and you are ready to start decorating
To make the flap holder cut a piece of paper or ribbon the length of the card and 1" thick. Staple or fasten with brads to just the top layer of the bag - don't go through to both layers or glue it down completely.
Remember to decorate your flap as well.
I do have my directions in word or pdf form also. If you would like a copy of that let me know and I will email it to you. Now if you're still with me I would love to hear your comments.