Monday, November 19, 2012

Tilda at the door

What inspires you to make a card. For me, this time, it was a door die cut and some hinges I have had forever.
The door is done with Tim Holtz's wood impression and Cherry Lane's door die cut. It was done is a beige cardstock and then rubbed over with brown ink to show the wood effect. Acetate is over the window of the door. I had a hard time photographing it. The wreath is stamped in green from a red rubber designs image and has red stickles on it and a gold bow. The poinsettias are from a shapebilities die cut and the holly is a memory box die cut. The inside of the flowers are yellow rhinestones. The edges are embossed with gold. I thought there was just a touch of gold ink until I added the embossing powder and then I saw how for in the ink had actually gone. 
When you open the door that is on hinges you get to see all of Tilda.

Tilda is colored with copics. I drew in the floor. There are some stickles on Tilda's dress, candle and headband.
And now for the inside.

Hope you enjoy this Tilda.

Sunday, November 18, 2012

Poinsettia

I love poinsettias at Christmas. My daughter doesn't but maybe she sees just too many in her work as a floral manager. But I love them anyway I can get them - real flowers, printed flowers in cards. 

This stamp is from red rubber stamps. I stamped on green and cut it out then I stamped it three times on mulberry paper and cut it out. I glued the layers together leaving the edges free so it had a little more depth. There are mini gold nail heads in the center colored with Krylon metallic gold for a deeper gold color. I colored the  flower with copic markers just a bit for a little more variation of color. Around the edges with a gold gelly roll pen i put some doodles. 
This is a little simpler than I have been doing but I need lots more cards done so they can't all be terribly involved. lol
Here is the inside.
The saying comes with the poinsettia stamp.
Hope you enjoy.

Friday, November 16, 2012

Once Again Old Swedish church

I'm really on a roll using the old Swedish church.

This time I cut the scene out and added a mini Tilda singing Joy to the world. Everything is colored with copics. Polar flower soft is on the church scene. Tilda's coat has liquid applique and glitter. The dots around the scene are done with liquid pearl. The bigger snowflakes have half pearls. The little snowflakes are from jolee. There is a small Christmas tree charm tied to the ribbon. 
Hope you are enjoying these old Swedish churches as much as I am enjoying making them.

Thursday, November 15, 2012

Another Old Swedish Church

I love this church scene but it is a bear to stamp. I keep getting marks where they don't belong. Fortunately Tilda covers most of the problems.


Tilda and the scene are colored with copics. Tilda's coat has liquid applique and glitter on it. The ribbon and the boots have diamond glaze. The scene has shaved ice and polar flower soft. Some of edges have stickles  and the flowers have yellow stickles. The snowflake centers have stickles as well. 
Tilda is popped with foam tapes.
Here is the inside. I actually decorated the inside a bit. 
 
I am entering this in the Magnolicious Challenge blog to use glitter or stickles inspired this photo.

Sunday, November 11, 2012

Old Swedish Church

As I love going to church I had to have this stamp but I have to say it is a background so it needed a Tilda to go with it. Mini Snowy hugs fit the bill.


I masked Tilda and snowy and then stamped the church scene. It is all colored with copics. The fur on Snowy and Tilda is done with liquid applique. The falling snow is polar flower soft and the snow laying on the ground is shaved ice. The poinsettia is cut from a shapability  from nestabilities and some beads by Suze Weinberg for the center. I tied some baker's twine around a couple of the layers and added a bow charm. Star dust stickles is around the white layer and gold stickles are around the red and green layers. Oh and I thought the church needed a cross so I drew one on the top of the steeple.
I need to get busy and make lots more Christmas stamps.

Saturday, November 10, 2012

We Give Thanks

I had to make some Thanksgiving cards for shut-ins at church. This is the last of them.


These stamps are so old I don't even know who made them. The labels have worn off. The main image was stamped on a dark blue and colored with prisma color pencils. The fence on the side is a punch from Martha Stewart. The leaves are some felt ones I got forever ago in the See Spot Save section at Target. You never know what you might find there. I colored them over with copic markers. A few stickles here and there and some nail head stickers in the corners finish it off.

Tuesday, November 6, 2012

Tea Time Tilda

Well this stamp is called Joyful Tilda but I like Tea Time Tilda. Alliteration is so much fun. She is from the Christmas collection but I made this as a Thanksgiving card.


Tilda is colored with copics with some paper piecing for the apron. The dp is from bo bunny. Lots of little embellishments - The teapot charm.

Here is some tulle with a circle clip.

And then there is the surprise.
Out of the top right hand corner you pull out a tag.

I am entering this in the Magnolia-licious highlights blog challenge here http://magnolia-licioushighlites.blogspot.com/ The challenge is to make a surprise - so my tag is  the surprise.
Hope you enjoyed Tilda.

Saturday, November 3, 2012

Thanks Again

I have Thanksgiving cards to make so I thought I would experiment with the same stamp and see what I could come up with this time.


I used this stamp from Red Rubber Designs. At first I stamped it on a piece of cross stitch fabric but I didn't think it showed the detail enough so I stamped it again on paper and put it over top the frayed edges of the stamped fabric. The letters have page pebbles over them. A little glitter on the leaves and some of the flowers for some interest. I roughed up the edges of the sage paper and the dp. I drew some lines around the sage paper. Added a ribbon and paper swirl clip. 
Which card do you like best - this one or the one on the post before.

Wednesday, October 31, 2012

Thanks

Finally took time to stamp again. This exercising really takes time but its worth it. I have lost 38 pounds since January and 70 since my high 6 years ago. I still have at least 28 pounds to go but would love to lose even more.


I used the Ever so Thankful stamp from http://www.red-rubber-designs.com/ever-so-thankful-rubber-stamp-set.html. It is colored with copic markers. The yellow paper is edged with gingerbread chalk ink. The edge is cut out with a fiskars border punch and then the swirls were left over from the punch so I colored those with the chalk ink and glued them to the top and bottom. The dp is from bo bunny. The yellow buttons have so glittery twine tied on them. I put stickles on the leaves and diamond glaze on the letters and acorns. Hope you enjoy.

Wednesday, October 10, 2012

Snowflake Tilda

I love Christmas and I love snow and I love Tilda so here is a card to go with all those loves.


Tilda is colored with pencils. Seems to be my favorite coloring medium again. Really I am just practicing to improve my coloring skills and for a class I am teaching on a yahoo group that I own. The large shapes are from nestabilities and the snowflakes are from memory box. Added  some stickles and the red nailheads in the one corner.
I would ask how you could not like Tilda but my youngest and oldest daughters don't care for her because she doesn't have a mouth but I think that just adds to her charm. There is no accounting for the tastes or your children, even the grown ones.

Saturday, October 6, 2012

Tilda and Lamb


I colored her with prisma color pencils. The poinsettias have gold flower soft in the middles with a bit of gold stickles. Two of the papers are outlined with gold stickles. The lamb had liquid applique on her. Tilda is sitting in shaved ice by Stampendous (I think). The pine branches that are stamped on the edge of the green paper is done with a stamp from Red Rubber Designs. They are adding lots more stamps so check them out. Thank you for your comments. They mean so much.

Thursday, October 4, 2012

Hurrying Christmas Tilda

The other day on facebook I commented that I wanted to run away from home as I was feeling a bit overwhelmed with working 7 days a week. So to go along with my feeling I chose this Tilda but hopefully she isn't running away from Christmas. 


I colored Tilda with prisma colored pencils. Haven't done that in a while. I saw a youtube video on coloring with pencils so I decided to try some of the suggestions. Needs a bit more work around the face. Practice makes perfect and I need a bit more practice. Added a few red stickles on the dress and flower. Some star dust stickles are on the shoes. The poinsettias are from hero arts. Put some lace behind the layers. Pearls and nail head stickers are in the corners. I punched some tags out and wrote Merry Christmas on them.
 

 The patterned paper is from Penny Black.  On the inside I think I will write something like "Couldn't wait to wish you a Merry Christmas" of "Hurrying to wish you a Merry Christmas. 
Hope you enjoyed my Christmas card. I need to make lots more.

Monday, September 24, 2012

Smocking

I found this dress by Carter's on sale at Target. It had the pleating but no smocking. Well I couldn't let it stay plain so I added the smocking. I hadn't smocked in years but I remembered how and made the pattern up out of my head as I went along.

Here is a close up of the smocking.
 I have another little dress to do. Can't wait to see how it turns out.
How much fun am I going to have with a granddaughter! lol

Wednesday, September 12, 2012

Jam Tilda

I just love this Tilda, of course there aren't too many Tilda's I don't just love. 
I colored Tilda with copics and added a few sparkles on her head wrap, lace and the bottle covering. There is diamond glaze on the bottle. The dp is from K & Company. The butterflies are punched from a Martha Stewart punch. The dies are from nestabilities. The beaded circles have liquid pearls in each circle. Two flowers have copper brads in them. The other flowers have mini dew drops. I put little doodles around the label nestalibities.

I made this card for:
http://www.magnolia-liciouschallengeblog.blogspot.com/ to use pink, brown, green and cream
http://flutterbywednesdays.blogspot.com/ - to use your favorite color - pink of course with a fairy or butterfly

Thanks for looking. Your comments are always appreciated.

Tuesday, September 11, 2012

Peanut

Once again it has been forever since I posted anything. I am hoping that I will be able to stamp more now that the wedding is over. I have so missed it. My dd made a beautiful bride. The wedding was lovely - simple but lovely. Now on to my card.


This is mini Peanut from the fall Magnolia collection. Isn't she a dear. Her little pleated skirt and sweater reminded me of my high school days so I colored them in my school colors - red and gold. Red and gold is still one of my favorite color combinations - my kitchen is done in red and yellow. I colored her with prisma color pencils. I don't know if you can tell but I made a subtle plaid on the skirt and scarf. The tree was done with memory box dies. I colored some of the leaves with copic markers. The dp is basic grey. I added some yellow rhinestones from Queen & Co. and some nail head stickers. The owl is from a set for the now defunct Angel Company. I just love fall. 

Wednesday, August 1, 2012

Stamper's Quest

I can't believe it has been so long since I posted anything. Life has been very busy. I am trying to get things ready for my daughter's wedding the end of August. Eek! It is August. lol And I have been trying to lose weight - 26 pounds since late January. Hooray! Lots more to go though. Here is a card I made for Stamper's Quest.

For more information about how I did this card check out Stamper's Quest.

Thursday, May 31, 2012

Dr. Tilda


Here is a card I did for Stamper's Quest, an e-zine. To see the directions on how to make Dr. Edwin into Dr.Tilda go here

Thursday, May 24, 2012

Strolling Tilda & Edwin

On someone's blog I saw them post about a romantic couple of Tilda and Edwin for some reason my mind immediately thought of combining Edwin wants a hug and this Tilda that I can't remember her name. 

Both images are colored with copics. For the dress I used RV 32 & 34 but didn't have a third color in the spectrum so I used the clear pen and dabbed some color off the lighter one and then used that to add just a light touch of color to her dress. I cut out both Edwin and Tilda and kind of intertwined them a bit and then glued them to a basic grey background and used copics to make a shadow around them. Tilda's dress, hat and umbrella all have some frosted lace stickles on the edges. I distressed the edges and sewed them all down. The corners are nestabilities fleur-de-lis cut in half diagonally and then I rounded off the edges. I colored the pearls in the center of the flowers with a yellow copic and added the other pearls to the corners. I really liked how this card turned out. Now to figure out what to use it for. I am made this card for the Midweek Magnolia challenge of romantic and chic http://midweekmagnolias.blogspot.com.au/ 
7kidschallengeblog for layers http://7kidschallengeblog.blogspot.com/
Stamptacular Sunday in the garden challenge http://stamptacularsundaychallenge.blogspot.com/

Tuesday, May 22, 2012

Silhouette Lady

I saw this stamp at my lss and it just spoke to me - "take me home, take me home". I don't know how stamps do that. 
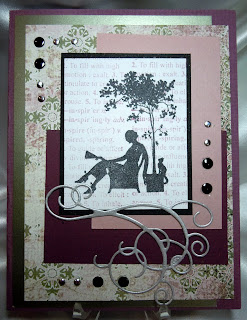
Pretty simple. I stamped words (the angel company) in plumeria chalk ink for the background and the image (Printworks) in black over top. The papers were all scraps that were laying about that seemed to go together. The swirl is from memory box in a silver paper - it was already cut just laying about. Then I added some nailhead stickers and it was done. I really like how it turned out. Now if I could use up the rest of the scraps that are laying about.

Monday, May 21, 2012

Cherry Tilda

I saw this cherry rhinestone sticker at Target and knew exactly what I had to do with it. If you want one run do not walk to your nearest Target. They are on clearance in the see spot save section. I got a bunch for 30 cents a piece - had been a dollar.


Tilda is colored with copics and highlighted with a white pen. The yellow dotted paper is the background from the cherry sticker. Waste not want not. lol The scalloped squares are die cuts from nestabilities. The blue dotted stripes are tape from the Queen and Company. I put red ribbon behind the stripe of blue and a smaller ribbon over the cherry stem. The red dots at the bottom are nailhead stickers. After I was done something didn't seem just right so I added the swirls - die cuts from sizzix and then added stickles to them. I am submitting this card at http://scrapbitzcopics.ning.com/group/cmccopicchallengegroup for the anything goes challenge and for Tilda's Town anything goes challenge http://tildastown.wordpress.com/2012/05/18/challenge-1-anything-goes/

Tuesday, May 15, 2012

Bird

Collage stamps are some of my favorites so when I saw this Hero Arts bird collage I just had to have it. 


This image is colored with copics and then there are sparkly pen accents and glitter glues added. The key is a memory box die cut and the circle is a nestabilities from stampabilities. I colored the circles in with my copics and traced around the inside edge. The buttons are some from my stamping stash and from my dress making stash (I have lots of different stashes lol) The blue lined paper is from bo bunny. The paper behind it is from basic grey. Both are edged with midnight blue chalk ink. The plaid strip and blue polka dot strip are trendy tape form Queen & Co. It is really cool as parts are transparent and let the paper show through. I thought it turned out pretty cool. Different from the style I have been doing lately. Gotta stir things up now and then.

Monday, May 7, 2012

Watering Can

I got this watering can stamp from Susana's Custom Art and Card Design here. I had stamped it a while back and then it didn't work for the sketch I was using so I set it aside. I pulled it out a couple of days ago and created this card.


I left the card pretty simple but I love this big bow with the tag tied on. The image is colored with copics. The watering can has diamond glaze applied to it. The flower centers and the butterfly have touches of stardust stickles. The dp is from basic grey. The other cardstock is all scraps I had laying about. I don't know about you but I have more scraps than I know what to do with so I love using them when I can.

Little Things

I love butterflies. There is hardly a stamp with a butterfly that I don't love. So when I found this digi from That's Fabulous here I just had to get it. 


I found a pretty moth and colored it similar. I know it is a butterfly but I liked the look of this moth. It is colored with copics and has some star dust stickles added. I put lots of flowers on the side and used yellow stickles for the centers. For the ribbon I put down scor-tape along the bottom and the added the ribbon by making little tucks along the way and pressing them down with my hand. 
I really like how it turned out. I have an owl that I got from the same place can't wait to use it now. It's so fabulous to make cards.

Friday, May 4, 2012

Teddies

My youngest dd turns 20 on Tuesday. It means no more teenagers. How sad is that. I have had teenagers in the house for 15 years and now those years will be gone. I never had a problem with any one age more than another so this is a bittersweet moment. I am getting older. lol Here is the card I made for her. She loves teddy bears.


The image is from Bildmalarna. It is all colored with copics. The pump has diamond glaze on it. The flower centers are done with citrus flower soft. The corner punches are done with ek success punches. The lady but is an old earring of my dd's as is the butterfly. So she should get a kick out of those embellishments.
Here is another view without the glare on the pump.

Hope you enjoy.

Wednesday, May 2, 2012

Stamper's Quest Pastels

Here is a card I did recently for Stamper's Quest. The challenge was to use pastels. I don't know why but I had a lot of trouble getting the right colors. Finally, I got it worked out and this is the result. The stamp is from http://www.susanascustomartandcarddesign.com/


To see how I did it go to http://stampersquest.com/2012/05/01/playful-pastels-peggies-view/

Friday, April 20, 2012

Raining Tilda

I originally made this for a pastel card to be submitted to Stamper's Quest but some how it didn't speak pastel to me so I decided to do a different card. I still like this one however.


Tilda is paper pieced and then copics are used to shade her. Spots and lines of white pen are used for accents. The dp is perhaps from basic grey. The words are from an old angel company stamp set. I added the dots with a sharpie black pen. The blue frame was white and then colored with brilliance blue ink pad. The ribbon was then tied around it. The flowers are cut from a die by my favorite things. The dots are sparkly candy dots. The butterfly was from my stash. We are supposed to get rain tomorrow so I may need to borrow Tilda's umbrella. Hope you enjoy.

Tuesday, April 10, 2012

Hot Mama

My girlfriend just had a birthday and this card is for her. She is 9 months younger than I am but always says she is 30. Let me tell you she is not. lol 

This is a digi stamp but I can't remember who it is by for the life of me. Senility is setting in. This cutie called Hot Mama (that I can remember) is colored with copics. Some stickles are on the flame and the pink frosting. The scalloped circle has holes punched out and dots applied around it. The candy dots in the flower center and below the lace are not quite so blue in real life. Added a bow as well. I need to get this out tomorrow as I am already late. The story of my life. lol

Doctor Edwin

I was asked to make some get well cards for church and this is the first one.


Edwin is colored with copics. His headpiece and stethoscope both have some stickles on them. I cut out an oval and scalloped oval out of basic grey. I lightly traced Edwin on to the white oval and then using a sponge and chalk ink made the blue shadow around him. The words were done on the computer using word art. On the blue circle around the words I wrote the words turn all the way around. Soo... you would knot to turn the circle to see the rest of the words. 

 You can't quite see all the words this time but it says "Listen to your doctor". I measured to find the center of the circles and punched a small hole with a long armed hold punch. Then I figured out where I wanted the words to be and put a small dot on the back of the oval through the hole so I would know where to punch that hole.And attached them together with a brad. The oval is raised with foam tape so the words will turn easily.The button is tied around the ribbon with scrappers floss to make the bow. Three nail head stickers are in the one corner. 

Here is the inside.
Hope you enjoyed this edition of Dr. Edwin. 
As always I love your comments. They mean so much to me.

Monday, April 2, 2012

Soccer Tilda

A girl in mt kids club at church likes to play soccer so this card is for her.I kept it kinda simple because she is a bit tomboyish - that and it was late last night when I was making it and I had to get it out today if it had any chance of making it to her by her birthday. lol


I took Edwin's body from playing soccer and added a Tilda head from a Christmas stamp but can't remember her name. It started out all blue but then I thought it needed a little more color so I added the red background then there was some red mulberry paper laying about so I added it and then put red flowers in the grass to help tie it together. I put some buttons on and added a bow at the bottom. Tilda/Edwin is all colored with copics. Hope you enjoyed my head "transplant."

Sunday, March 25, 2012

Christmas in March

I realized it was the 25th and last year I made a Christmas card most every 25th of the month and hadn't done so this year. If I don't get crackin' I won't have any Christmas cards when I need them.

I hadn't used this image but once or twice and think she is so pretty so I pulled her out today. Tilda is colored with copics. W1,3,5 for her dress. R49, 46,44 (I think) for the roses and trim on her dress. G9,6,3 for the leaves. YR23,21 for her hair. B60,W1 for the background. I used gold stickles for her halo with some star dust stickles as accents for the halo and flowers. The paper is capella from basic grey. I roughed up the edges of some of the papers. The lace was sitting on my desk and I thought it would look pretty with some ribbon woven through it. Added some swirls from a memory box die and then put some nail head stickers in the corners.
 I so enjoy your comments.

Friday, March 16, 2012

Irish Edwin

My son-in-law is 100% Italian born on St. Patrick's Day so this card is for him.


Of course Edwin has to be dressed in green. He is colored with copics and his tie has little white dots on it. I edged the papers with a dark green marvy ink pad that I have had for years and years. The pad stamped okay for the swirls but when I edged with it pieces of the pad broke off adding bits of dots around the image. I used a tissue and tried to smooth the dots out a bit. The dark green clover or flower is done with 4 scalloped hearts from stampabilities and edged with a light green chalk ink. The lime green flower has a brad in the middle. The brads in the corner have their prongs broken off and attached with glue dots because I didn't decide to put them on until the card was all put together. The swirls are from the angel company. The green cardstock from DCWV around Edwin was run embossed with dots and then I used a piece of sandpaper to take the color off. I used the saying May the road rise to meet you... Irish saying for the inside.
This card fits in perfectly with the green challenge over at Just Magnolia.

Tuesday, March 13, 2012

Rose College

I made this card to go along with the book Behind the Beautiful Forevers that we are reading over at http://scrapbitzcopics.ning.com/group/bookends. What a tough card to make. I haven't finished the book yet but much of it is set in the slums of India. How do you make a pretty card about slum life?

The image is from the angel company (retired) and is colored with copics. I tried to use scraps, found and discarded items or reused items to make the card. In the book one of the main characters finds and sells junk so that is why I chose to use these items. In the beginning the one boy uses a rose a description about their lives so that is why I chose a rose. The clock face is from a watch of mine that broke. The brass rings were some my kids found on the ground a long time ago and brought them home to me because I might be able to use them in a card. The bee charm was on an old ATC from a swap. The heart I had used on a purse I had made but it fell off. The fence is a punch from Martha Stewart (which wasn't working very well) because there are fences around the slum. 
Let me know what you think about this card. I would be very interested in hearing comments as it was so difficult to make.

Saturday, March 3, 2012

Fight 2

Finally got to doing my second card with this image. I printed it out a couple of days ago so had no problem with the ink smearing. I usually don't have that much forethought to print them early. I get an idea and I want to run with it. lol

The spray at the bottom is a die cut from memory box. I usually use a glue stick to put them down but this time I poured out some diamond glaze and used my finger to smear it around. A little messier but it worked better. The dp is some old from tac. I am trying to use up some of the stuff I have. I have way too much. I know you all know what I am talking about.

Wednesday, February 29, 2012

Fight

I have a couple of friends who are fighting breast cancer so this is for one of them. I will make another one soon. 
The image is from Whimsie Doodles here. Hope is colored in copics. I had a bit of trouble with smearing. I don't know why I don't usually when I use a digi. I changed papers and that helped. It was just on the face so maybe it was because there is so much ink on the eyes and freckles. I designed the Fight like a girl myself on the computer. The gloves have glitter on them. I got that idea from someone who put glitter on Tilda's boxing gloves. Wish I could remember who to give credit to. The dp is from basic grey. The ribbon has a copper brad through it. The flowers have copper nail heads for centers as well as a couple of nail heads over the left hand side of the image. Hope you enjoy.

Monday, February 27, 2012

Tilda on a bike


Doesn't Tilda look like she is having fun? I made this card for Book Endz here. We read the book Where the River Ends by Patti Callahan Henry. In the opening scene the girl, Meriday is riding her new pink bike with her lime green party dress on - it did not make her mother happy. Later in the book there is an incident with fireworks so I gave Tilda a sparkler to hold instead of the heart lollipop. I seem to be into altering Tildas lately. 
Hope you enjoy my creation. Thanks for leaving comments. They really make my day.

Saturday, February 25, 2012

Kite Tilda


I was looking through my collection of Tildas and realized I hadn't used this Tilda - ever - shameful I know. So here is Tilda flying a kite.


She is a challenge to put on a card as she is so big. 
I paper pieced Tilda's top and kite. She is colored with copics as is the background. The snail is a little clip that my dd gave me for Christmas.
I even decorated the inside - something I don't do too often.

Hope you enjoyed the card.